
This is my first Deck Tech so bare with me. This is my personal Persona 4 Deck and I will update this post with every change I make to it. I will try to explain my thought process and if you have any questions just leave a comment.
I'll Start with the deck list.
Level 0 - 16
3 Chie Satonaka
2 "The Heartless Armed Angel" Aigis
2 Teddie in Yukata
3 Kanji Tatsumi
2 Nanako Helping Out
4 Yosuke in Yukata
Level 1 - 10
4 "Contract Key" Protagonist
2 Protagonists Partner, Yosuke
2 "The Bloodcurdling Beefcake Emperor" Kanji Tatsumi
2 Inedible Curry
Level 2 - 12
4 Yosuke & Susano-O
3 Destined Confrontation Labrys
3 Chie & Tomoe
2 It's my turn
Level 3 - 4
4 "The Raging Bull of Destruction" Shadow Labrys
Climax - 8
4 Brave Blade
2 Arrival of Asterius
2 Bond with Fist
Ok, for level 0 We Run 16 Characters. The First being.

Chie Satonaka, She is just a 3k Vanilla, and mainly used for Colour Correction but can also be put to waiting room as cost for Chie & Tomoe

"The Heartless Armed Angel" Aigis. She is the brainstormer of the deck. She lets you swap cards from your clock out. She can also be dropped on turn one as she gains 2k power when she is alone.

Teddie in Yukata. The only support of the deck, due to the fact that most of the deck does not share traits i ran a generic support that gives all characters 500 power on the opponents turn, as well as the ability to boost a character by 1k whenever you play an event.

Kanji Tatsumi. Kanji is a generic suicider used mainly to force side attacks or to lower your opponents hand size.
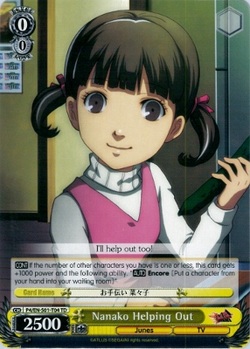
Nanako Helping Out. This card is great if its in your early hand, if alone or with one other character it sits at 3.5k with hand encore allowing you to trade hand for stock at a 1:1 ratio.

Yosuke in Yukata. This is probably my favourite level 0 of the set. Its a suicider that acts slightly differently sending the card back to their hand and making them discard something. this means they cannot encore.
For Level 1 we only have 8 Characters and 2 Events

Contract Key Protagonist. This card sits at 7k base when it has chosen a card. The only downside is that the chosen card gets sent to waiting room when this card does. I run four of this as it is the main Level 1 Beater and at 0 Stock cost it allows you to build more stock for the later points of the game.

Protagonists Partner, Yosuke. This is the only backup in the deck and also has a change into our main level 2. The change is really strong because this card returns to your hand allowing you to still use it as a backup after changing.

"The bloodcurdling Beefcake: Emperor" Kanji Tatsumi. This is our climax combo of level 1, aswell as another 1-0 so that we can gain stock. The climax combo allows you to pay 1 stock to Send one of your opponents 0 Cost characters to the waiting room, and then this card gains +3000 Power, Making it 8k.

Inedible Curry. This event allows you to make any card a suicider, allowing you to deal with the huge walls or buffed characters your opponent puts up. its second effect is that if your opponent has no Stand characters you can choose a card and put it to the top of your opponents deck. The main use of this secondary effect is to guarantee the first card of damage is not a climax, it also allows you to deny changes by moving the target from waiting room to the Clock.
For level 2 we have 10 Characters and 2 Events

Yosuke & Susano-O. This is the main level 2 of the set. WIth the change into it you can play it earlier as well as it having a great climax combo. The first effect is if all of your opponents characters are rested this card gains +4000 power and 1 Soul. and the second and in my mind the most important effect is that when this card attacks you may pay 1 to send any character back to your opponents hand.

Destined Confrontation Labrys. This card is mainly used for its effect allowing you to pay an extra 3 when this card is played to put it into memory and take a "The Raging Bull of Destruction" Shadow Labrys and place it on the stage, and at the beginning of your next turn Destined Confrontation Labrys moves from your Memory onto any position on the stage. This means you can get your level 3 out earlier as well as having guaranteed field presence next turn.
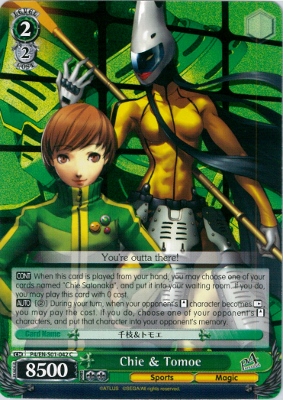
Chie & Tomoe. This card is great at level 2 as it can be played for no cost if you have a "Chie Satonaka" in hand or on field. and its effect to move one of your opponents cards from field to memory, The only condition being that they are standing, combo's amazingly well with "It's my Turn!".

It's my Turn!. This card lets you pay one rest one to rest one of your opponents cards and then send a level 2 or lower card from your opponents field to memory. This lets you deal with any walls they put up as well as comboing with Chie & Tomoe
and for Level 3 we have only 4 Characters

"The Raging Bull of Destruction" Shadow Labrys. This card has 2 effects the first being a healer. and the Second being a climax combo that allows it to clock shoot any level 2 on the stage for 1 stock if it reverses a level 2 or higher Character. This is the main finisher of the deck and the only Level 3 I run. It can also get onto stage early due to "Destined Confrontation Labrys"
and Finally the Climaxes

Brave Blade is the main climax of the deck and the main combo I use, it lets you counter changes and any card with counters. Also the wind trigger can do the same thing.

Arrival of Asterius is the combo for Labrys that is used as the main finisher of the deck. The gold bar means it is almost always available to finish the game with and it will rarely get stuck in stock.

Bond with Fists is the decks early game combo used to keep field advantage, and the Gate trigger is the only form of Search or Salvage in the deck.
How I play the deck
Mulligans
I will usually Mulligan very aggressively for level 0's because this deck requires a lot of stock end game and building it up is very important. Although it can be worth holding onto a "Contract Key" Protagonist or two if you have at least one Level 0 to play.
Level 0
The main aim here is to build as much stock as possible whilst setting up your hand for level 1. You will generally want to side attack to keep field presence. and many players wont frontal attack your suiciders as they do not want to lose their field and give up a free direct attack. You want to build 6 + stock if you can before Leveling up, you also want to clock until you have some sort of Level 1 Available.
Level 1
At level 1 you need to focus mainly on keeping field presence and setting up stock for level 2, Placing a Protagonist's Partner Yosuke into your backstage allows you to change with it safely and as it returns to your hand you can use the back up at a later time. Don't be afraid to stock encore if you have built up an excess and have nothing to play from hand in the upcoming turn.
Level 2
You should now have a large amount of stock built up and hopefully some of your level 2 cards or the Labrys combo in hand. Your aim now is to finish the game. Use the Events and Climax combo's to Keep field advantage and lower your opponents hand size. and don't be afraid to stock encore. Field advantage is the most important thing from now on.
Level 3
This is the final bit, if you have set up correctly you will now have a Labrys or 2 out on field or in hand, and hopefully one of the climaxes available, so use them to finish the game and remember sometimes lowering your damage is a good thing, if they are at 3-5 swinging for 3 3 times isnt worth it. Swing for 3 Once for the Clock Shooter and bring something with 1 Soul forward or side attack to get that 1 Damage you need.
